CycleClick Installation Instructions
Google doc version HERE
Kit Contents
Your mounting kit includes:
- Ball joint mount
- Universal mount
- Alternative 1x mount
- Locking ring
- Stabilizer
- Adhesive rubber pad
- Spacer
- Tube rubber
- 4 rubber O-rings
- 2 zip ties
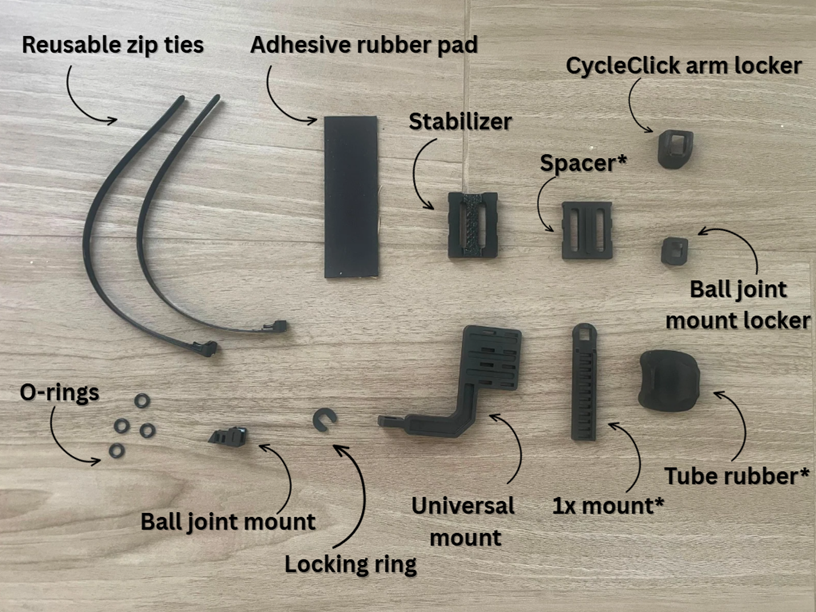
* These parts are optional and may not be needed for your installation.
Step 1: Prepare your Bicycle
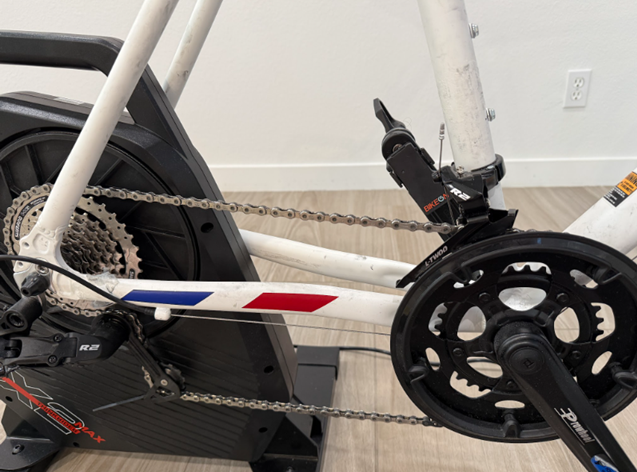
- Shift the chain onto the largest front chainring and the largest rear cassette sprocket.
Step 2: Assemble the Ball Joint Mount
- Insert the ball joint mount into the square opening of the universal mount.
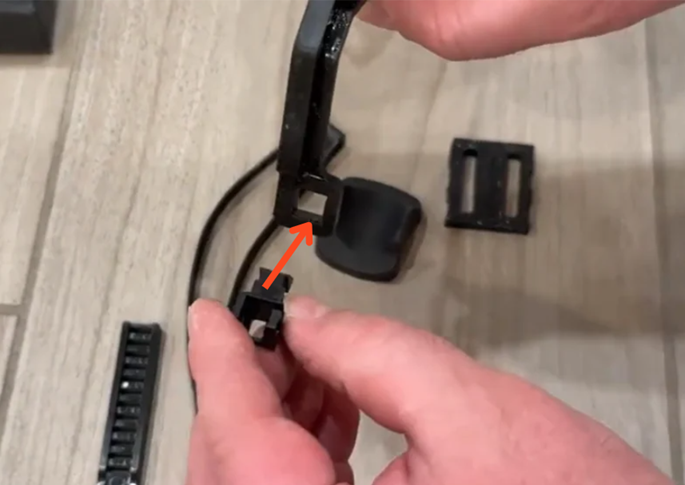
2. Secure the ball joint mount with the locking ring.
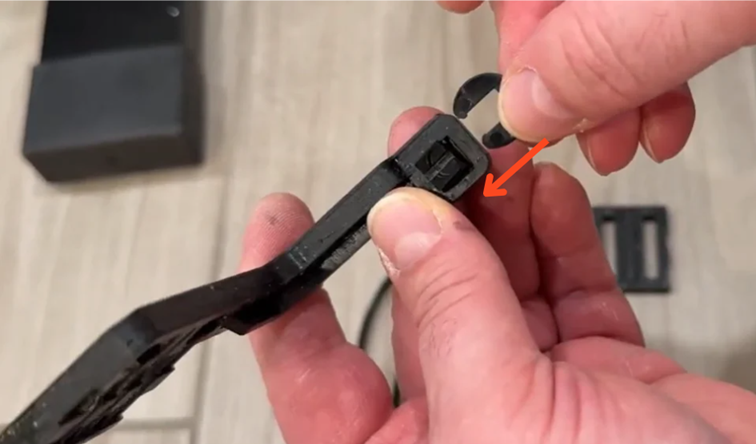
Step 3: Prepare the Universal Mount
- Take one zip tie and:
a) Slide one small O-ring onto it.
b) Pass the zip tie through the first opening of the universal mount.
c) Slide a second small O-ring onto the zip tie.
d) Pass the zip tie through the second opening of the universal mount.
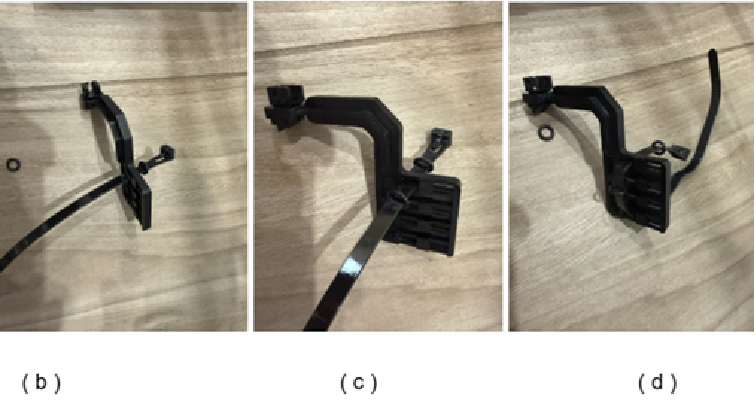
2. Repeat the same process with the second zip tie and the remaining two O-rings.
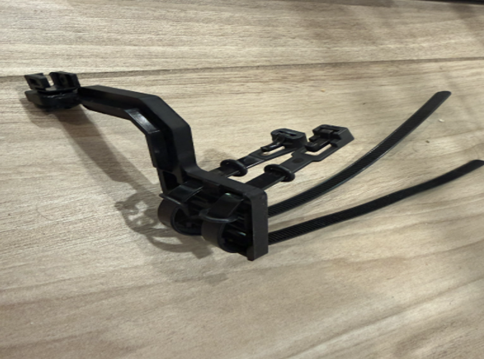
3. Insert the stabilizer into the openings of the universal mount.
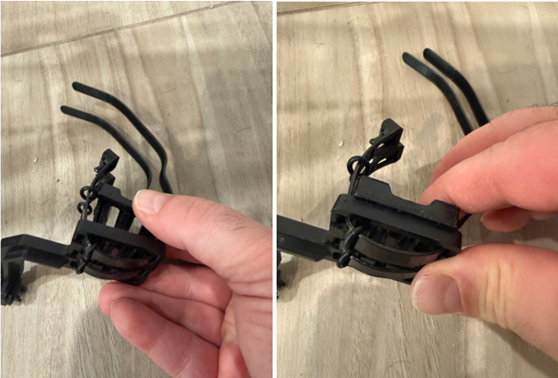
Step 4: Install the Universal Mount on the Bicycle
- Locate the installation position on the seat tube.
- Position the universal mount so that its lower end is approximately 8-10 mm (about the thickness of a finger) above the chain.
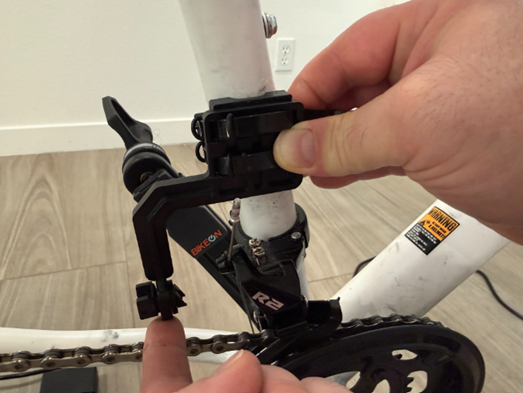
3. Remove the protective backing from the adhesive rubber pad and wrap the pad around the seat tube.
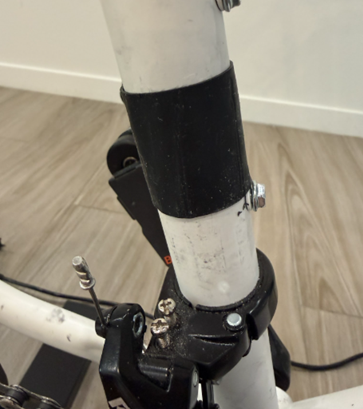
4. Place the universal mount over the rubber pad and lightly tighten the zip ties. The mount should still be able to rotate slightly.
5. Rotate the mount until the ball joint is positioned slightly behind the chain, toward the rear wheel.
6. Fully tighten the zip ties.
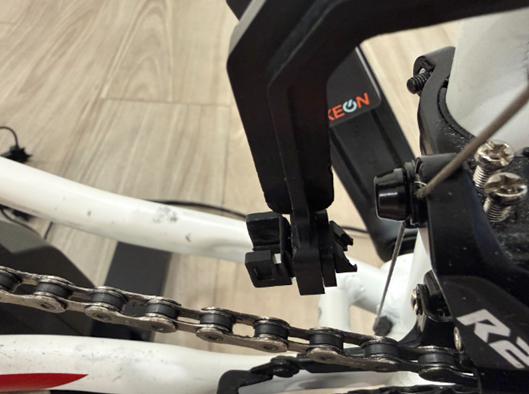
7. Slide the ends of the zip ties through the O-rings to complete the mount installation.
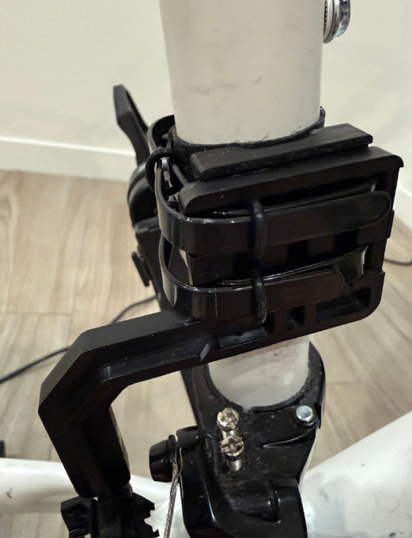
Step 5: Attach the Retention Arm
- Slide the ball-joint locker onto one end of the retention arm.
- Apply slight pressure and position the arm end diagonally relative to the ball-joint locker, as shown in the illustration.
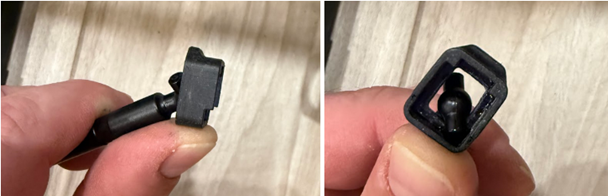
3. Press the arm's ball joint into the ball-joint mount.
4. Ensure that the alignment pin on the ball enters the square opening of the mount.
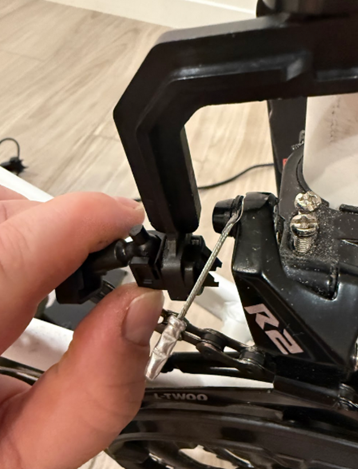
5. Slide the ball-joint locker fully onto the mount until it is securely seated.
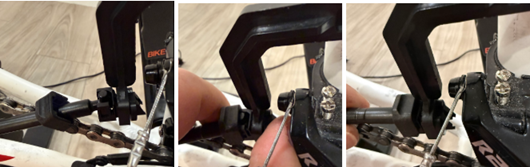
Step 6: Install CycleClick on the Chain
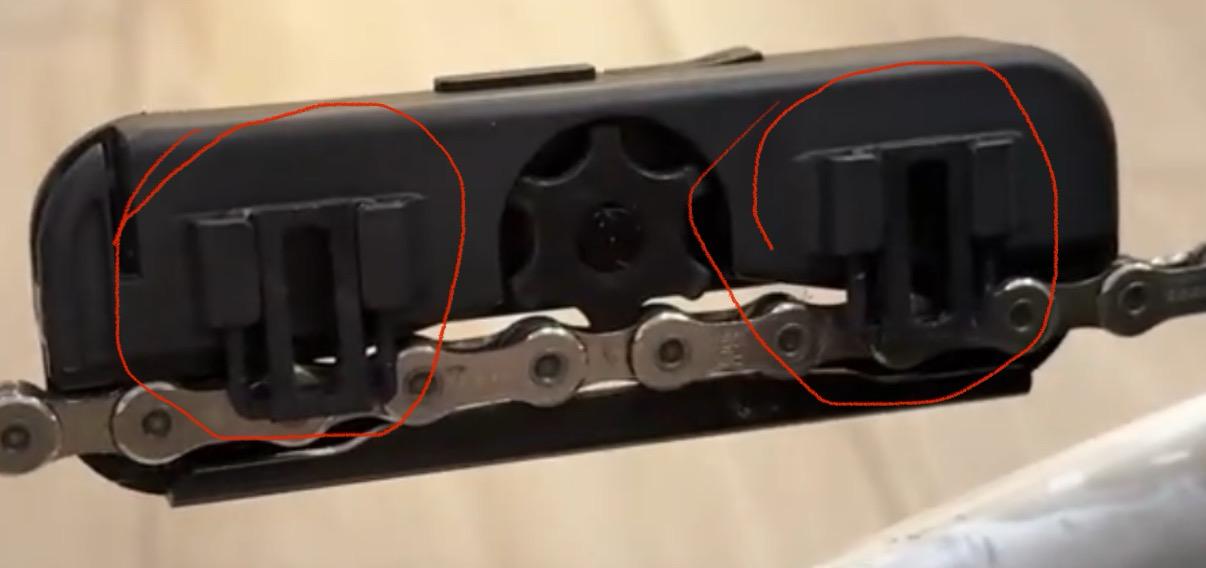
- Raise both chain lockers on CycleClick to their upper position.
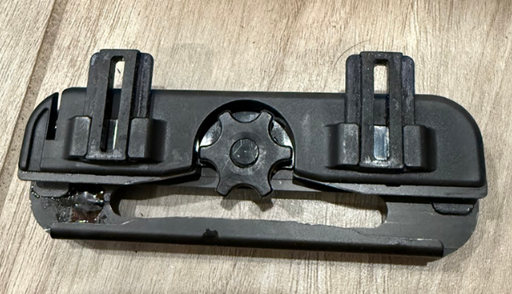
2. Place the CycleClick measuring channel over the chain so that the edge of the channel rests on the chain rollers.
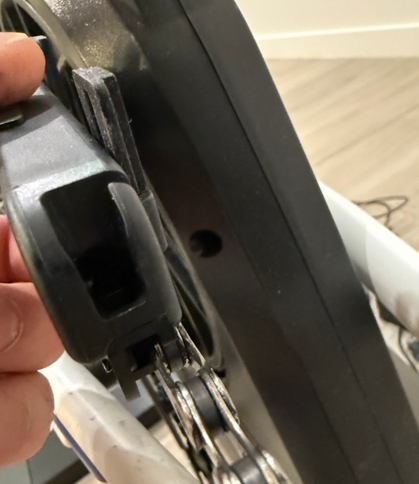
3. Verify that the speed-sensor roller fits into the gap between the chain rollers.
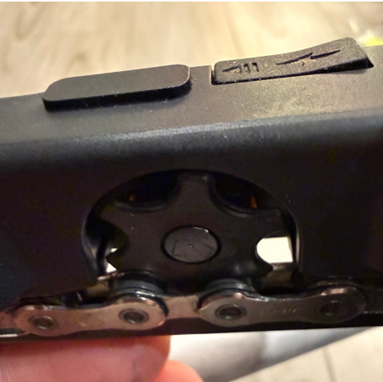
4. Lower both chain lockers completely.
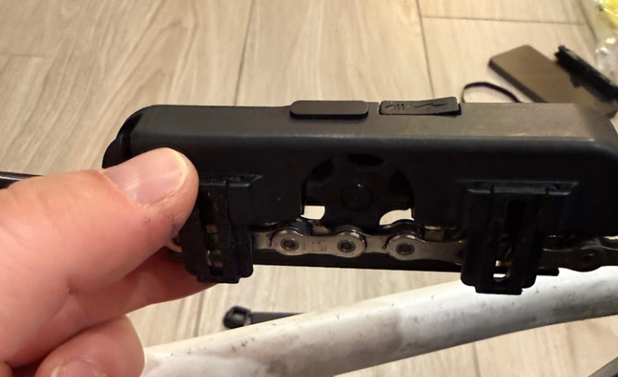
5. Move CycleClick along the chain by hand. It should slide freely without binding.
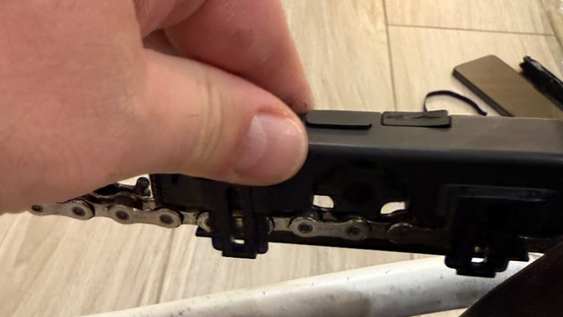
Step 7: Connect CycleClick to the Retention Arm
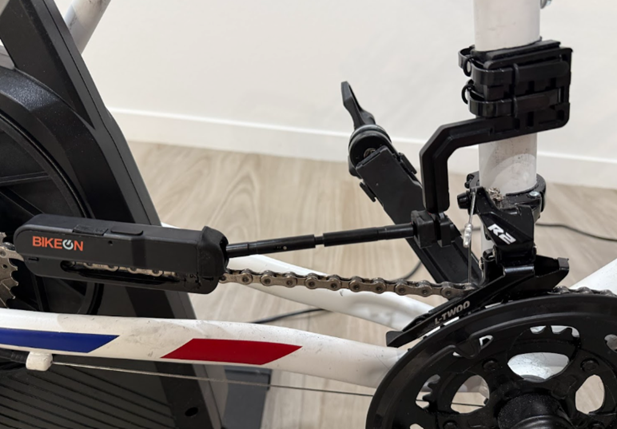
- Slide the CycleClick arm locker onto the end of the retention arm.
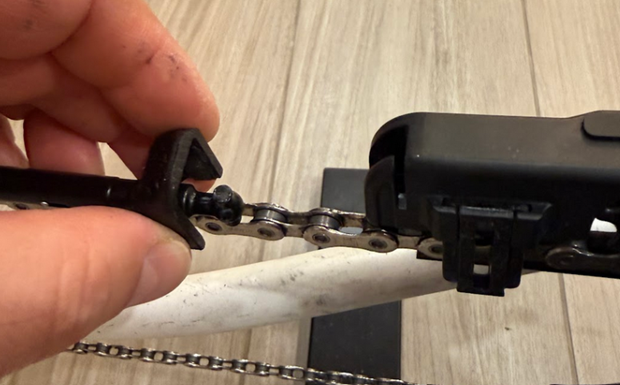
2. Press the retention arm ball into the socket on CycleClick.
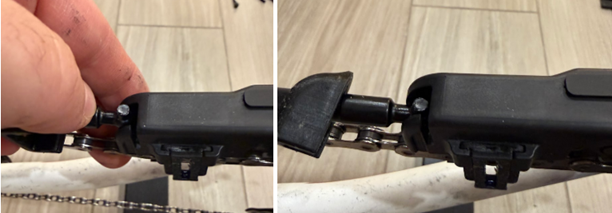
3. Slide the arm locker onto the CycleClick housing until it clicks into place and locks securely.
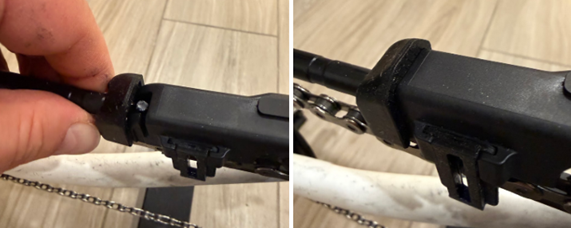
Step 8: Final Check
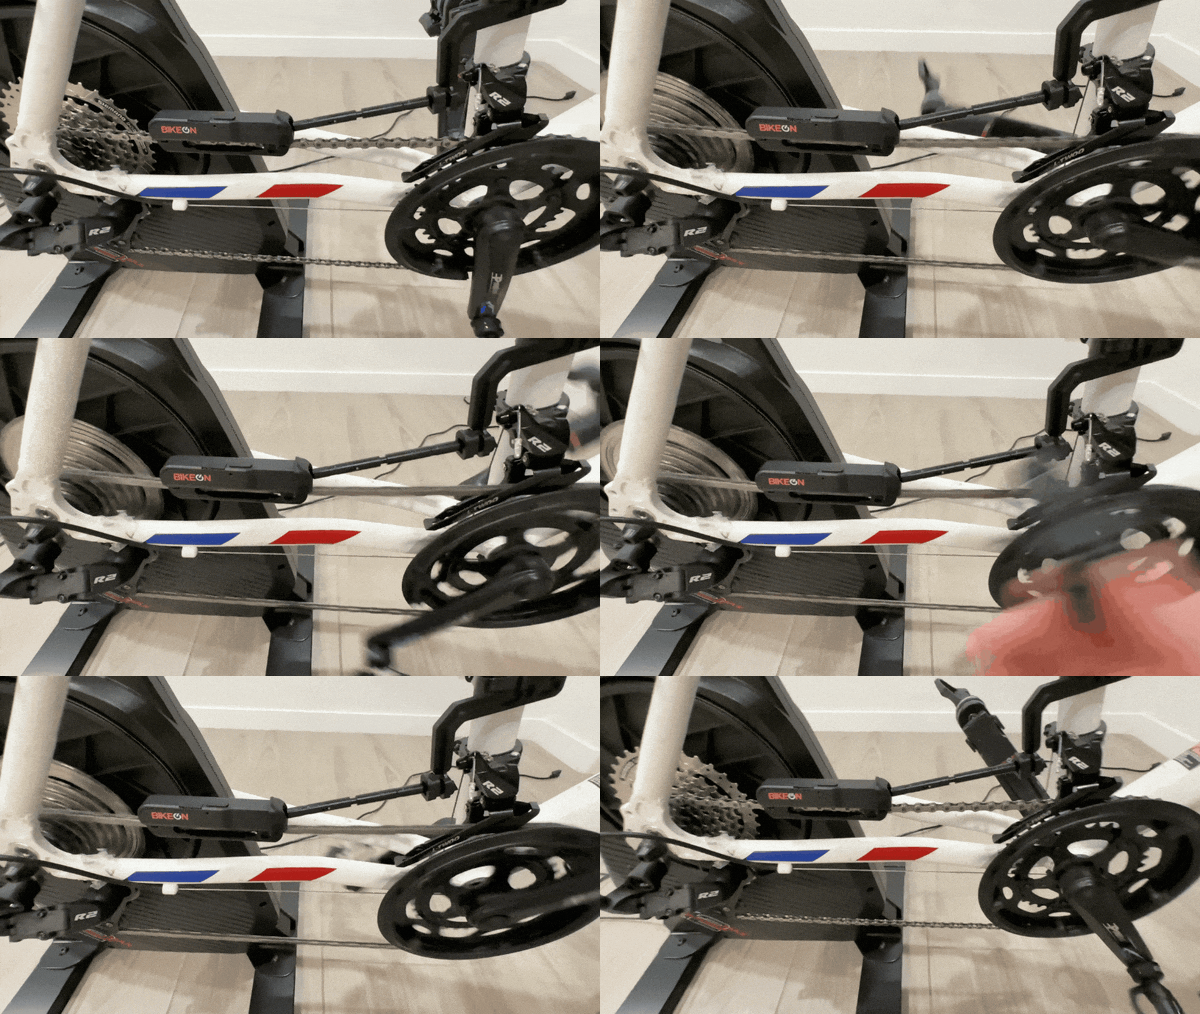
- Rotate the pedals backward several times.
- Confirm that CycleClick moves freely along the chain without rubbing, sticking, or binding.
Step 9: Power On and Calibrate CycleClick
- Once CycleClick is installed on the chain, slide the power button to turn it on.
- The indicator light will turn on briefly and then turn off.
- Do not touch the pedals, the chain, or CycleClick during this process. Keep the bicycle completely still.
- Wait until the indicator light turns back on and begins blinking.
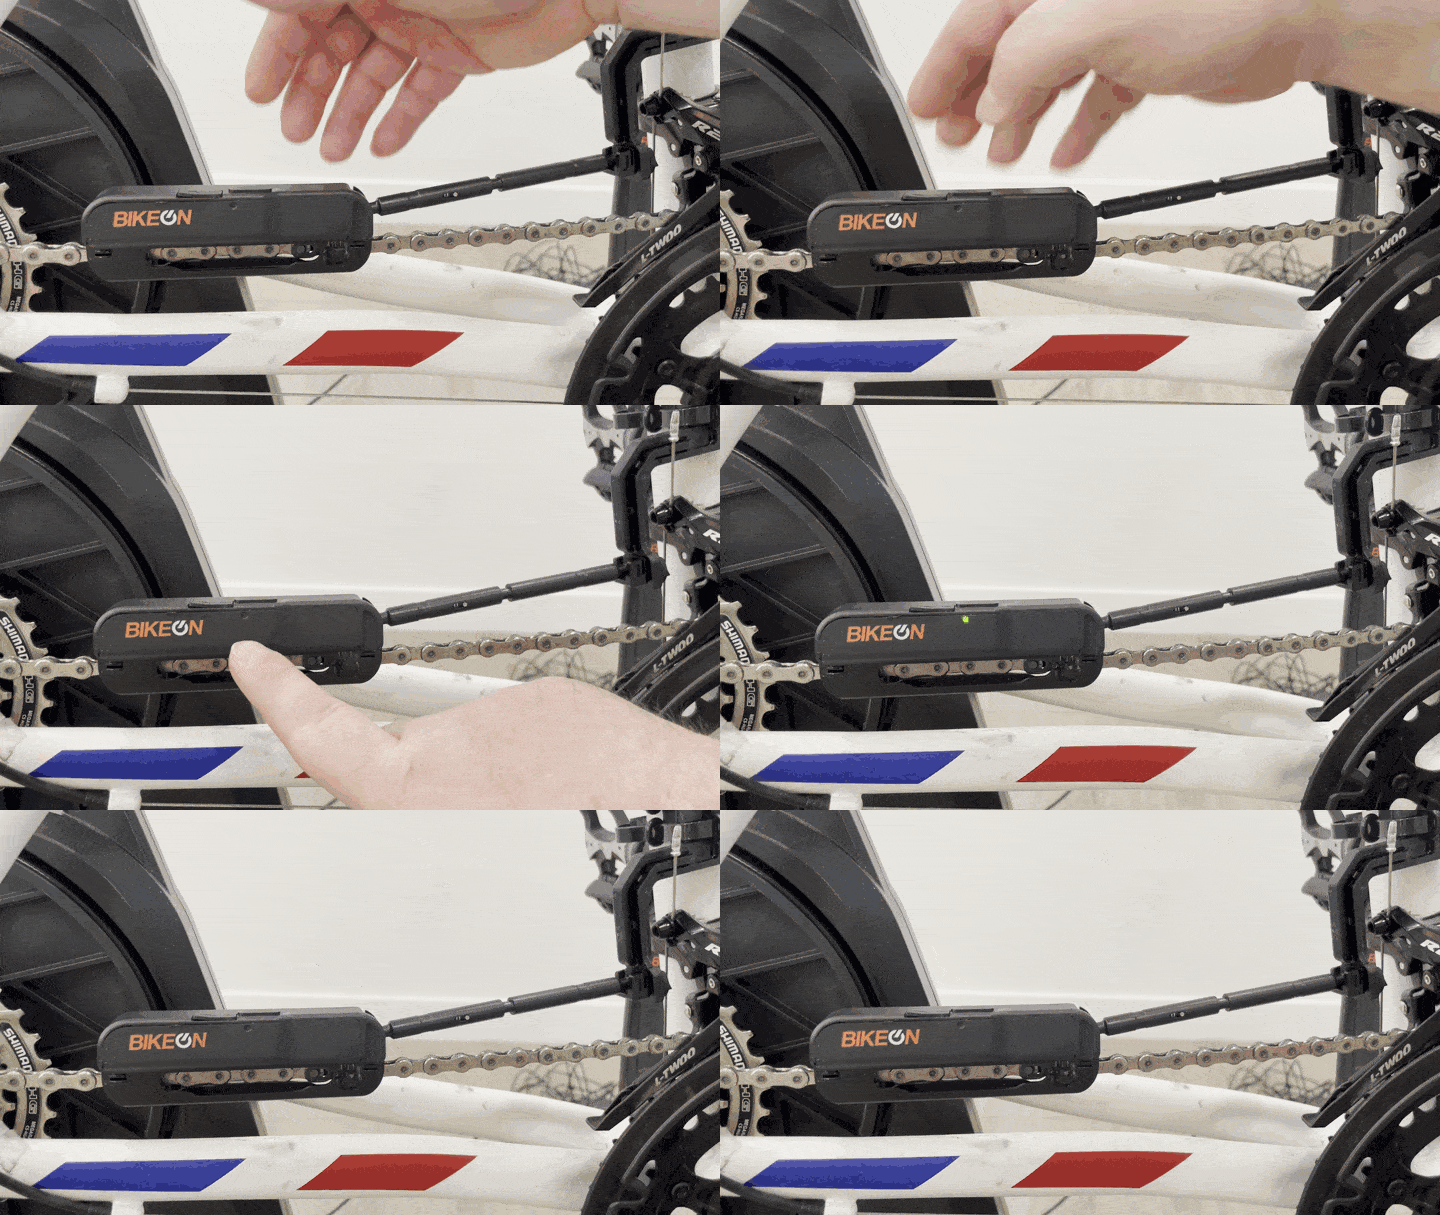
5. A blinking light indicates that the internal calibration has been completed successfully and CycleClick is ready to connect to the BikeOn app or your cycling computer.